smart-grid-cloud
Smart Grid Cloud
A cloud-native system for monitoring and early risk detection in power grids, based on telemetry data from smart inverter devices. Developed as laboratory exercise material for the “Cloud Application Development in Smart Grids” course at the Faculty of Technical Sciences, Novi Sad.
📋 Table of Contents
- System Architecture
- Technologies
- System Components
- Clean Code Principles
- Prerequisites
- Local Environment Setup
- License
- Contributing
🏗 System Architecture
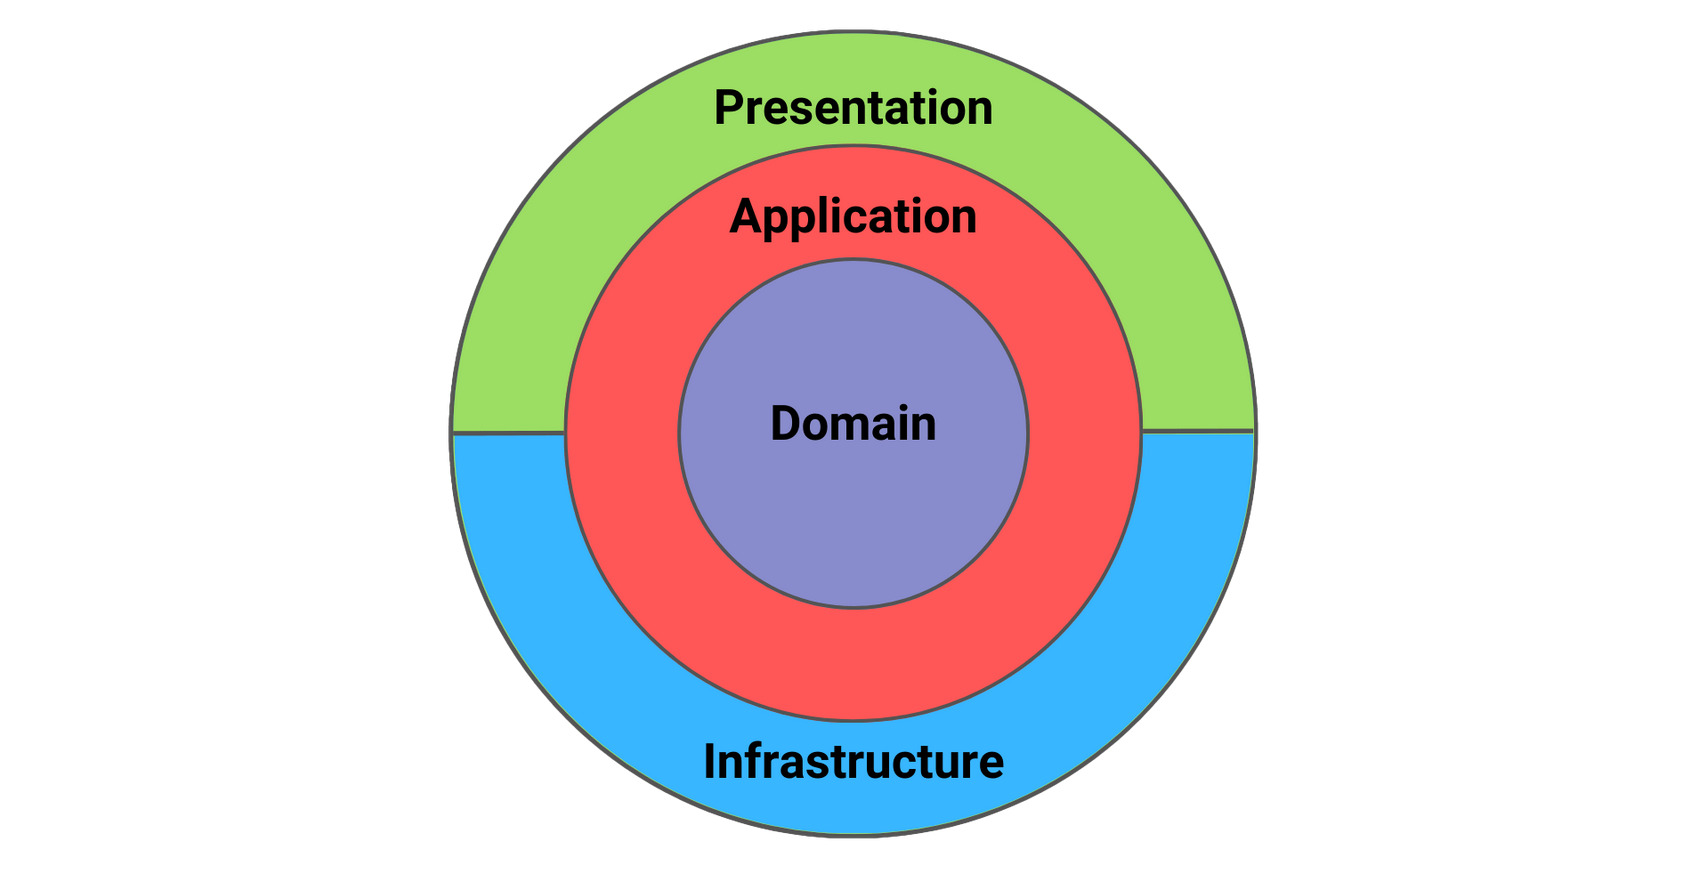
The system is built following the principles of Clean Architecture and Domain-Driven Design (DDD), organized into four layers:
| Layer | Role |
|---|---|
| Domain (Core) | Defines business logic, rich domain models (Entities), and Value Objects. Independent of any external technologies or frameworks. |
| Application (Use Cases) | Orchestrates business logic using the CQRS pattern via the MediatR library. |
| Infrastructure (Technical Details) | Implements interfaces for data persistence (Azure Table Storage), file storage (Blob Storage), and messaging (Queue Storage). |
| Presentation (Entry Point) | Azure Functions and an ASP.NET Core Web API that expose functionalities to clients. |
🚀 Technologies
Core Framework
- .NET 8.0 – Developed using the Isolated Worker model for Azure Functions, providing decoupled execution and full control over dependencies.
Cloud Infrastructure (Microsoft Azure)
| Service | Purpose |
|---|---|
| ⚡ Azure Functions | Serverless logic handling HTTP, Timer, Blob, and Queue triggers. |
| 🗄️ Table Storage | Low-cost NoSQL storage for measurement history, device metadata, and system snapshots. |
| 📁 Blob Storage | Secure storage for binary firmware files used in Over-The-Air (OTA) updates. |
| ✉️ Queue Storage | Asynchronous messaging for reliable processing of alerts and status updates. |
| 🔄 SignalR | Real-time, bi-directional communication between the backend and the Dashboard. |
Patterns & Validation
- 🎯 MediatR – Implementation of the Mediator pattern to decouple components, including Pipeline Behaviors for cross-cutting concerns.
- ✅ FluentValidation – Robust input validation to ensure data integrity across the system.
💻 System Components
The system is architected into four main layers, ensuring scalability and real-time responsiveness.
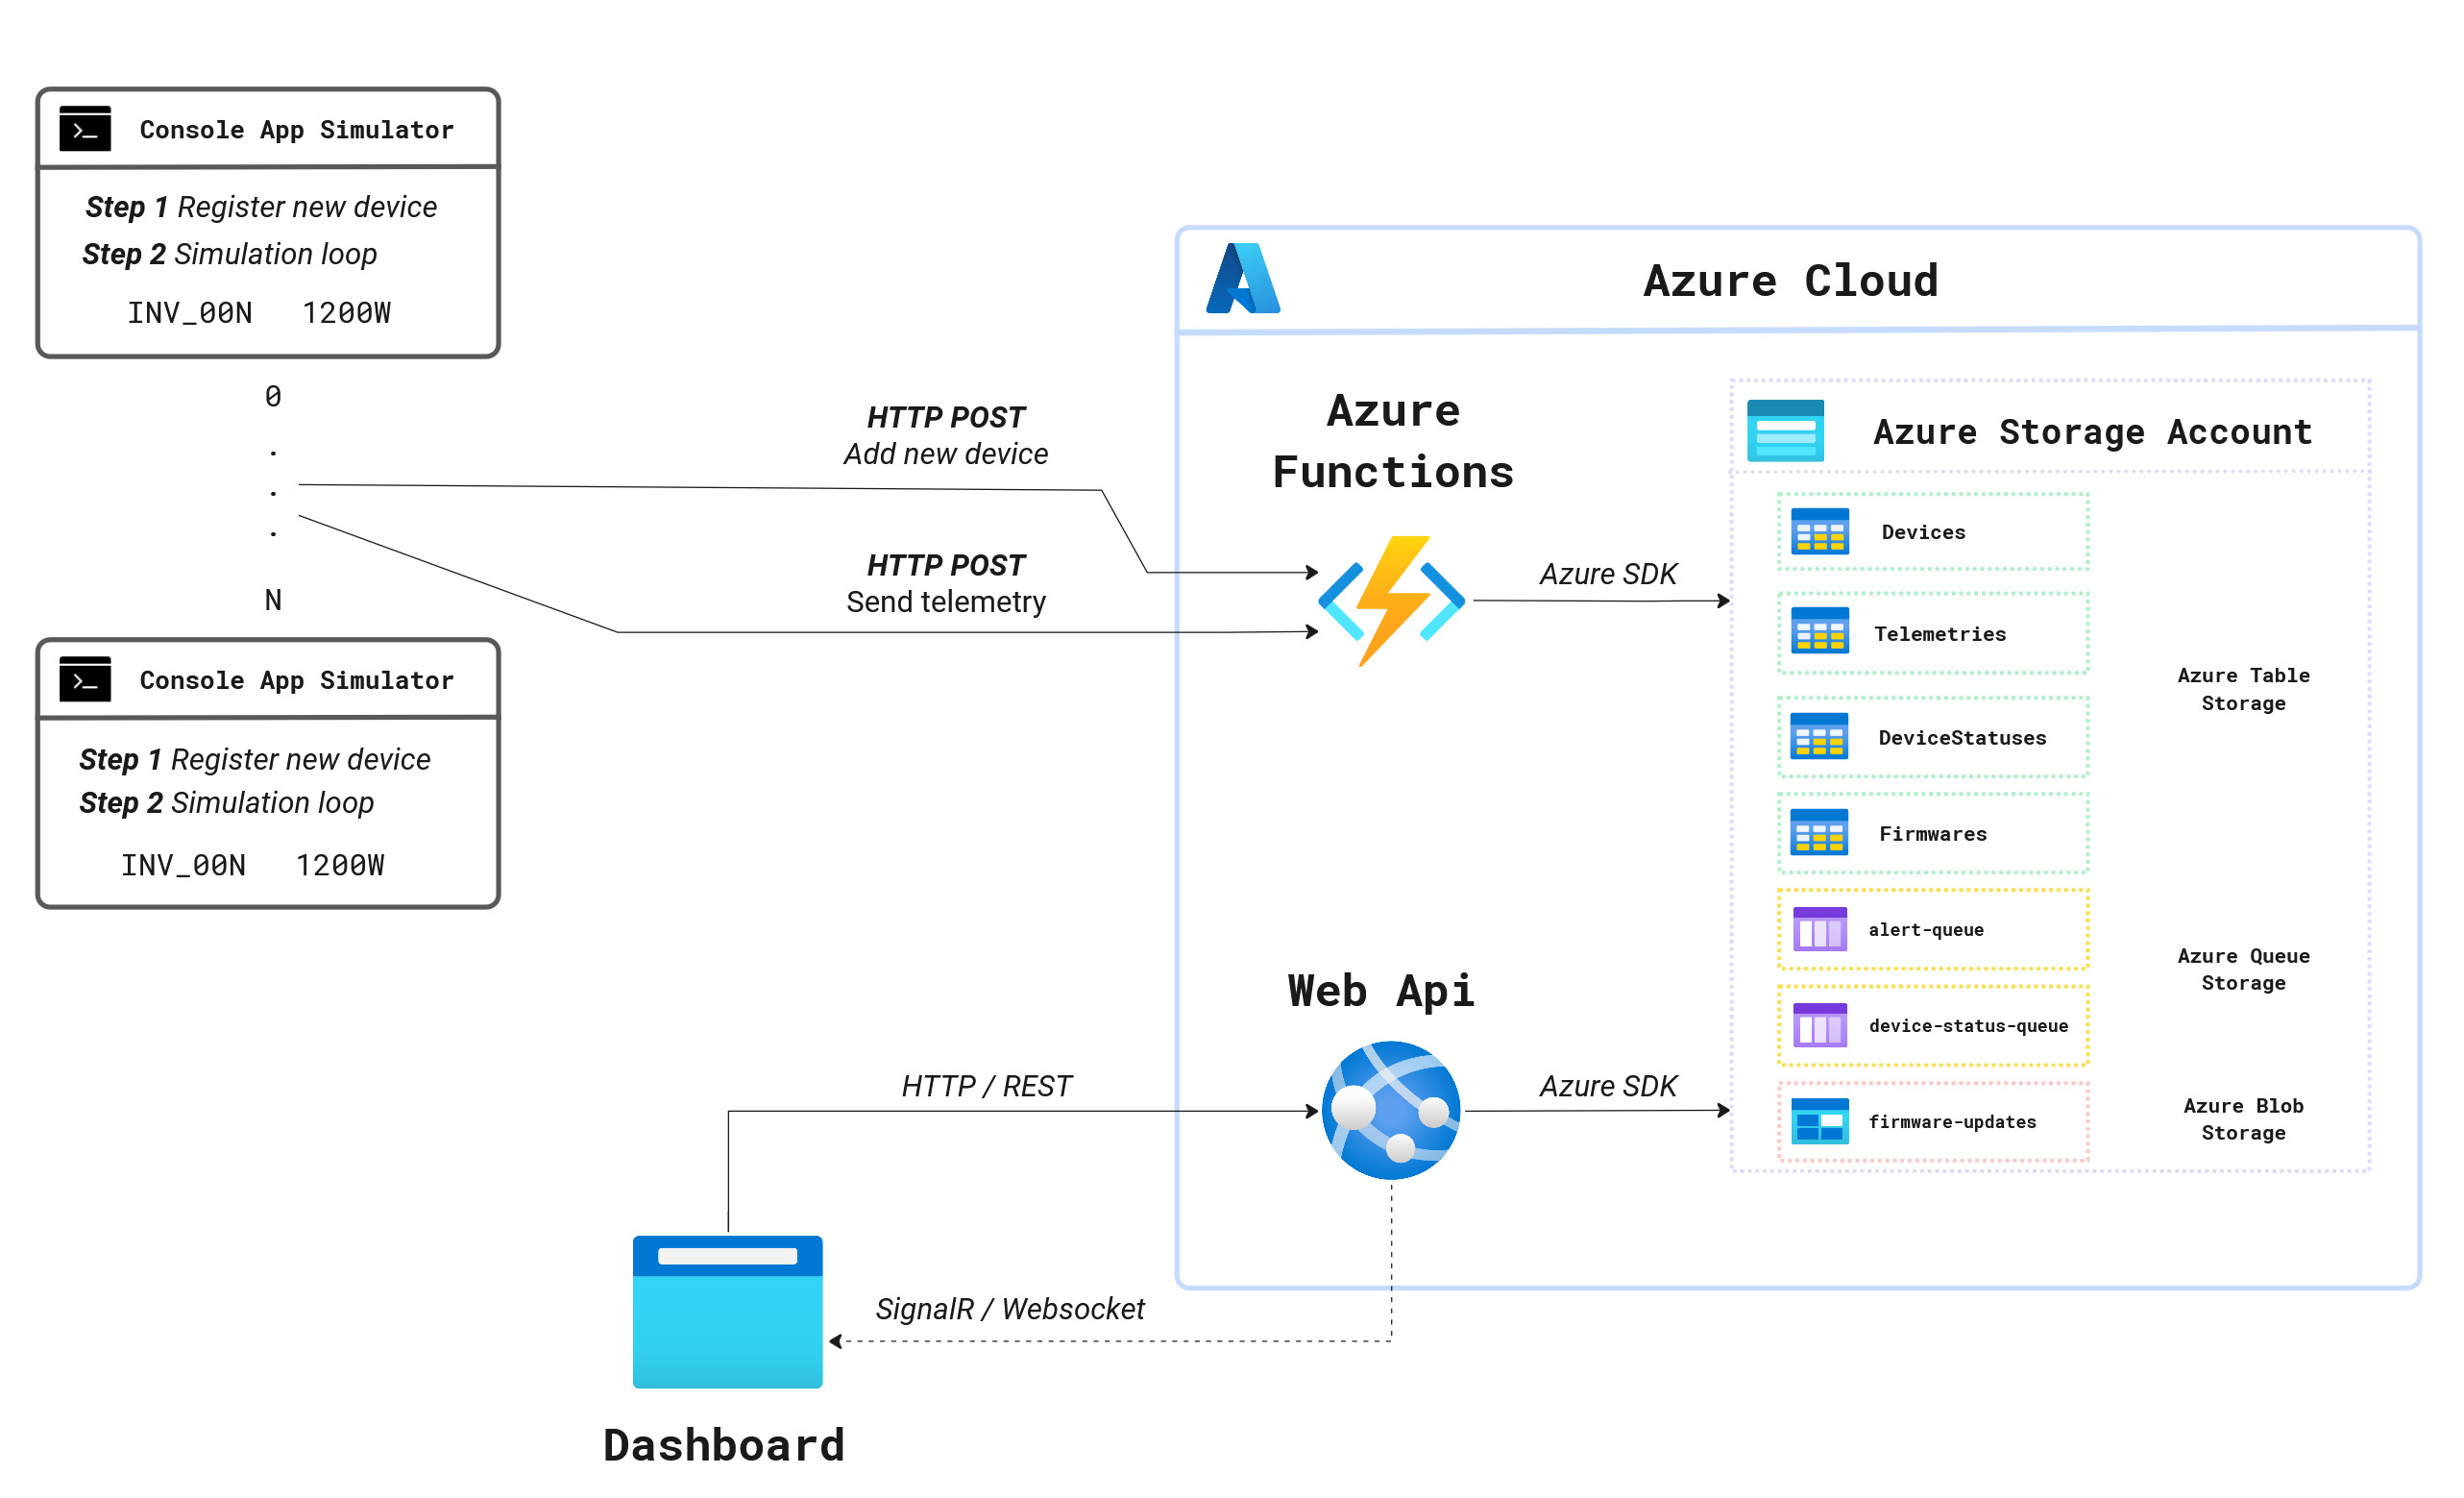
🔌 Inverter Telemetry Simulator
Role: Simulates field devices (Smart Inverters).
- Handles device registration and periodically pushes telemetry data (power output, voltage, timestamp) to the cloud via HTTP.
- Provides a consistent data stream for testing system load and anomaly detection.
⚡ Azure Functions – Serverless Backend
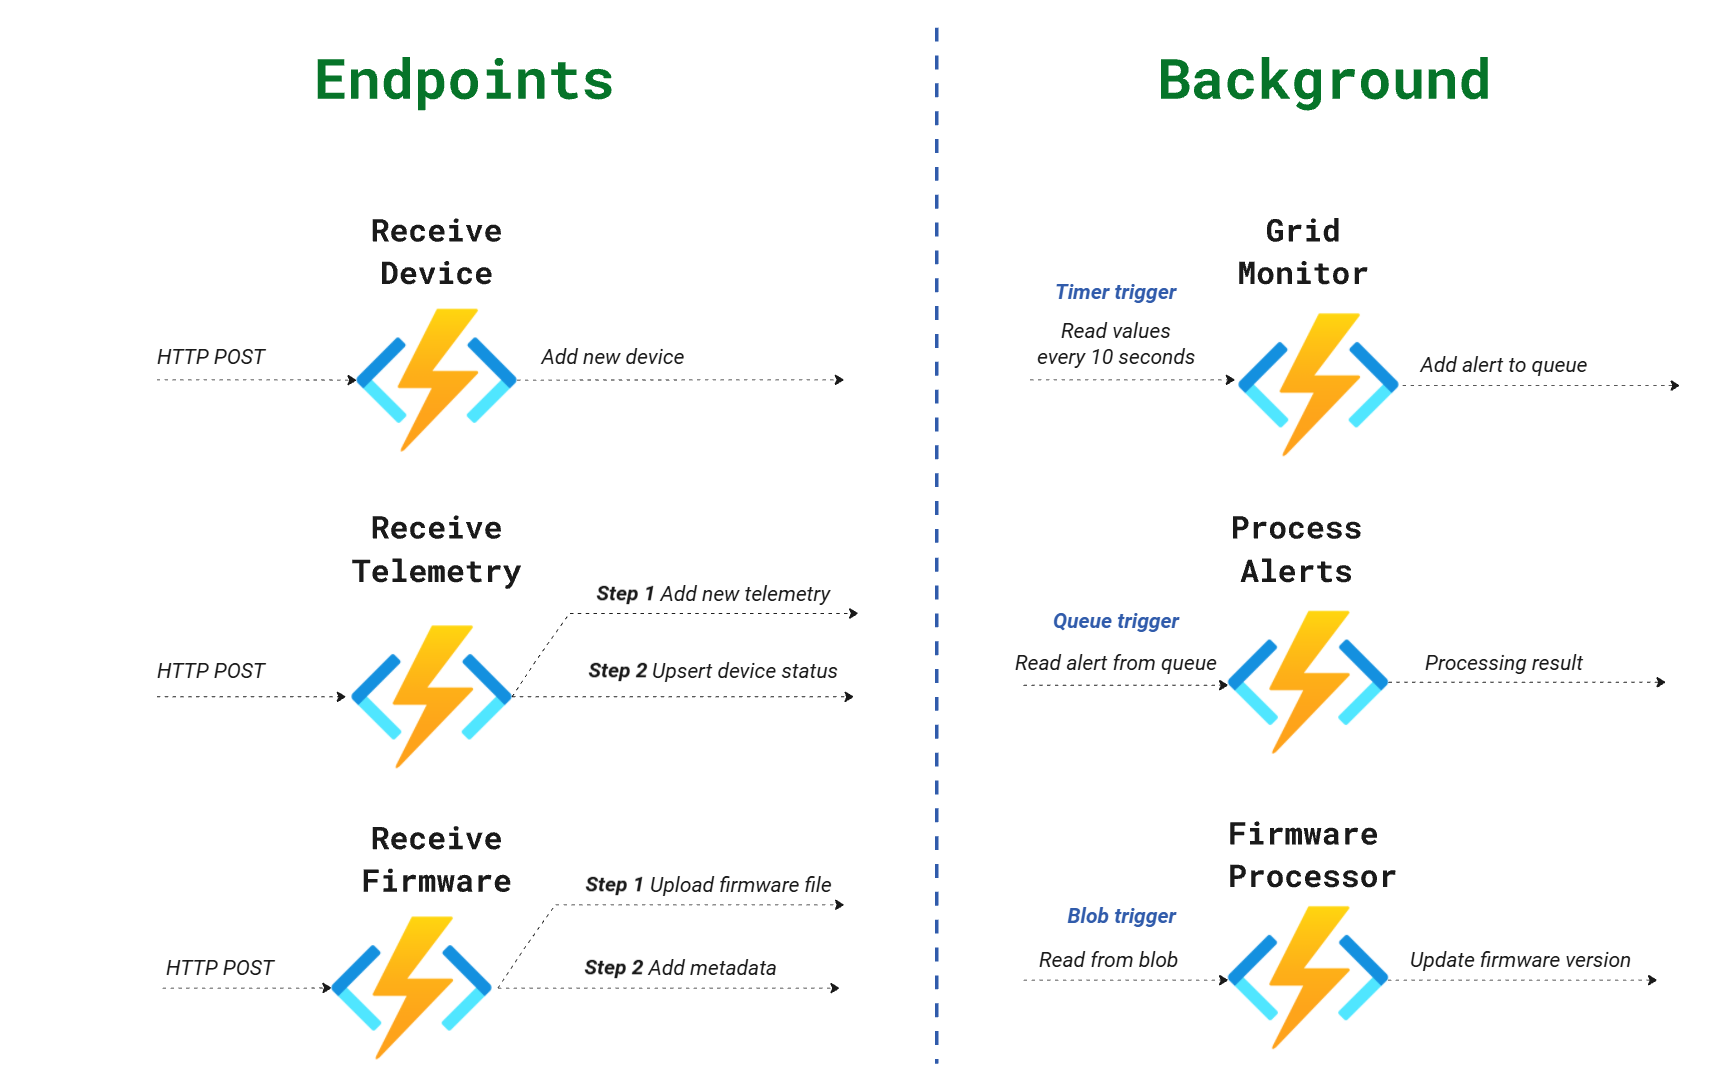
Acts as the event-driven core of the system, processing data through various triggers:
| Function | Trigger | Description |
|---|---|---|
| ReceiveTelemetry, ReceiveDevice, ReceiveFirmware | HTTP | Ingests raw data, calculates load percentages, and triggers downstream processing. |
| GridMonitor | Timer (10s) | Performs periodic health checks to detect anomalies like grid overloads or offline devices. |
| FirmwareProcessor | Blob | Automates the OTA update flow whenever a new firmware binary is uploaded. |
| ProcessAlerts | Queue | Decouples critical alarm logging and processing from the main data ingestion flow. |
🌐 Web API & Background Worker
- SignalR Hub (
DeviceHub) – Manages real-time, bi-directional communication with the dashboard. - DeviceStatusWorker – A dedicated background service that polls the status queue and broadcasts live updates to the UI.
- REST API – Provides management endpoints for device metadata, historical telemetry, and firmware management.
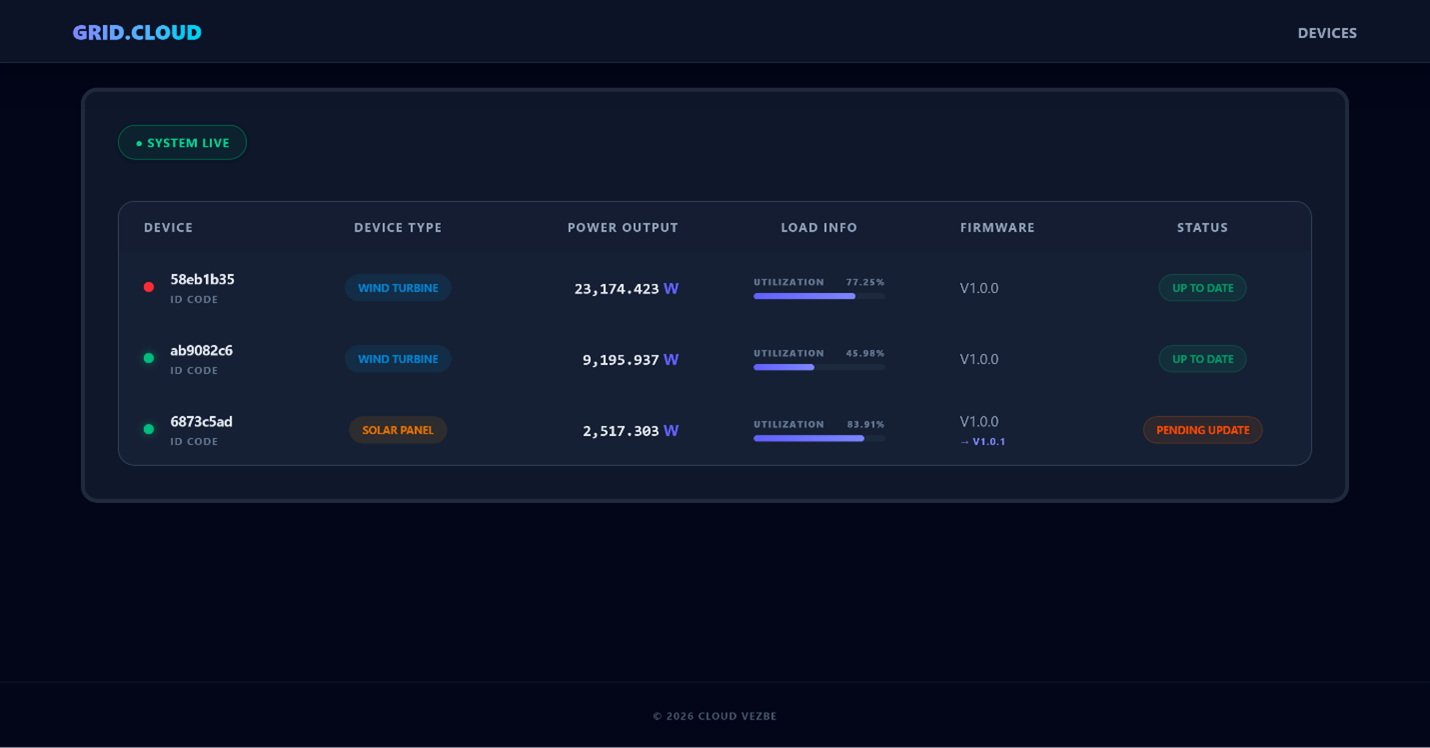
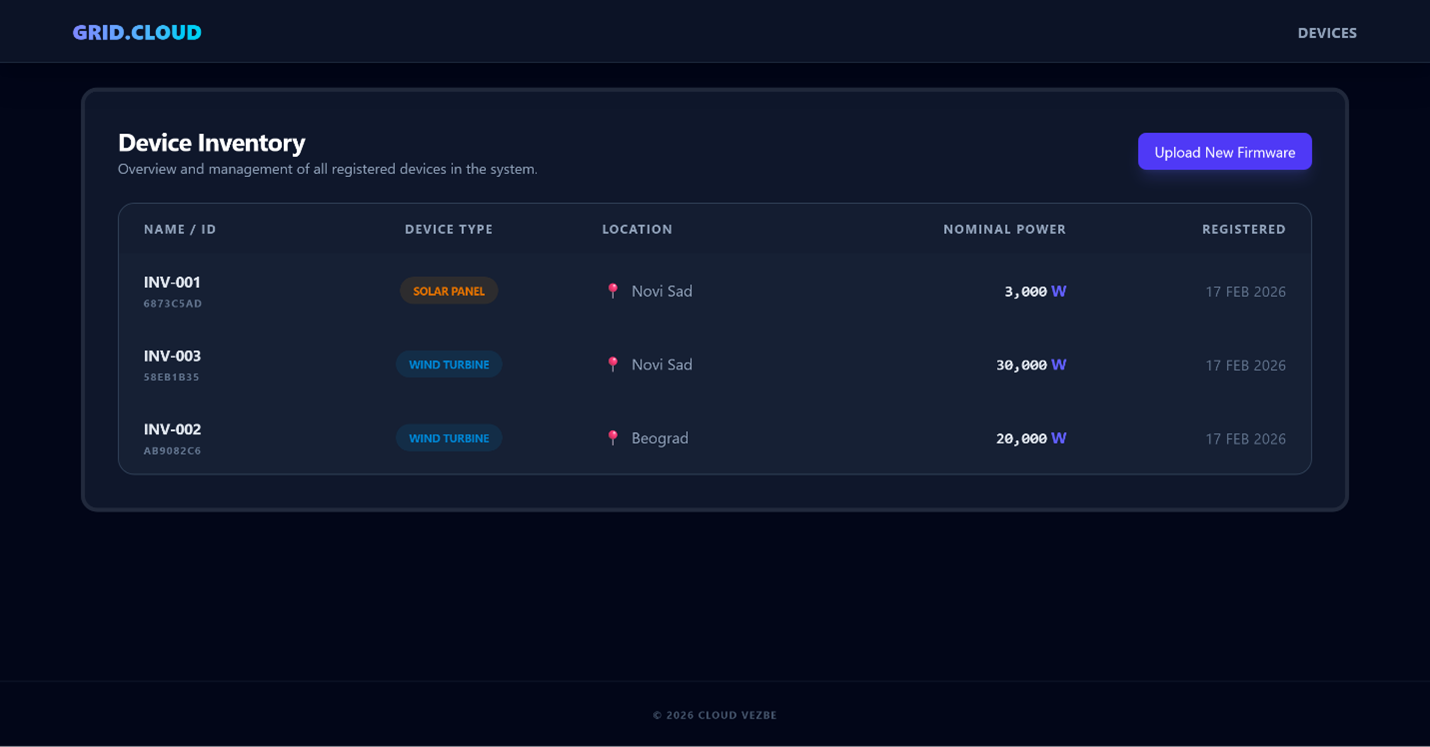
📊 Dashboard
Tech: Node.js-based web application.
| Feature | Description |
|---|---|
| Live Grid State | Real-time visualization of the power grid status. |
| Device Management | List and monitor all registered smart inverters. |
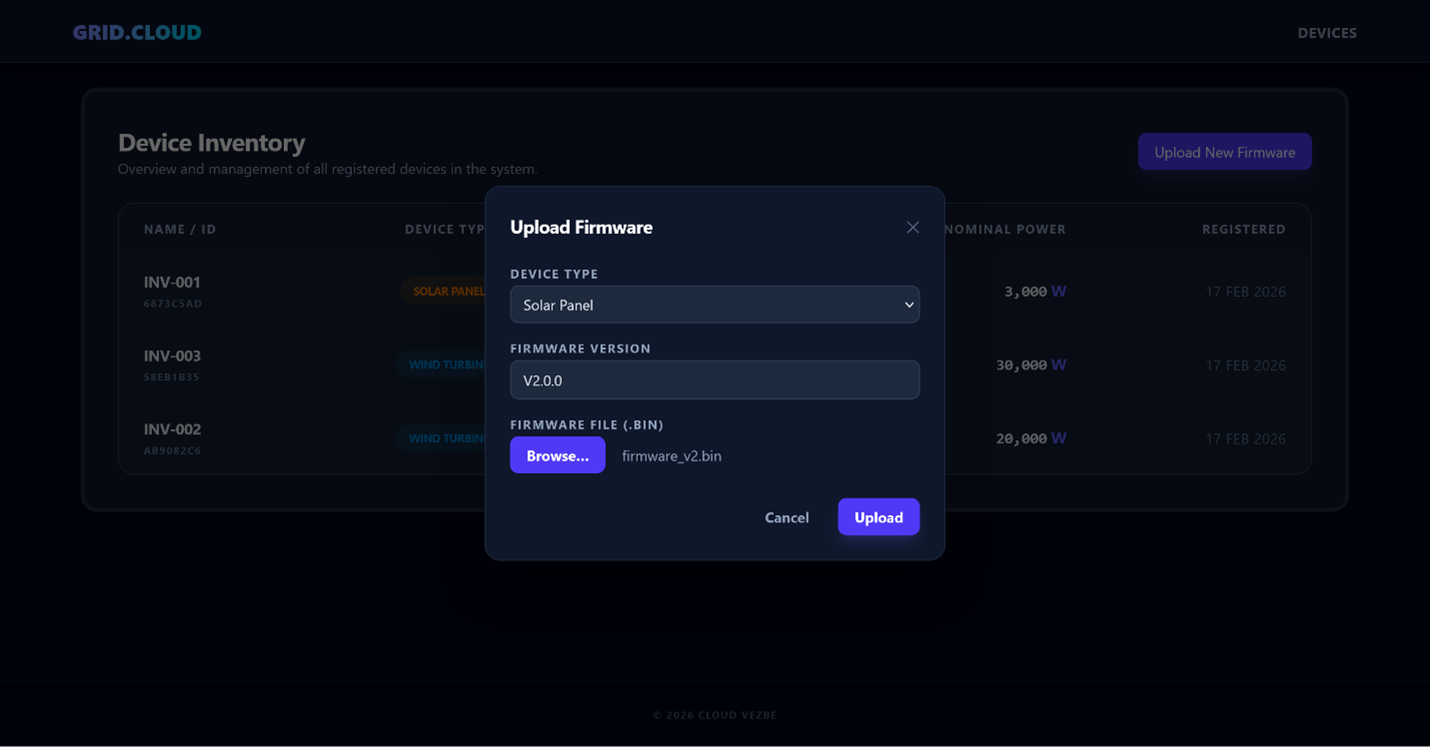
| Firmware Interface | Dedicated UI for uploading and deploying firmware updates across the grid. |
🛠 Clean Code Principles
The project strictly adheres to clean code standards:
- Result Pattern – Used for business logic flow control instead of throwing exceptions.
- Meaningful Naming – Classes, methods, and variables use descriptive, self-documenting names.
- Single Responsibility – Every class and method has one primary purpose.
- Eventual Consistency – Balances performance and data consistency in a distributed cloud environment.
📋 Prerequisites
- Visual Studio 2022 (v17.x) with the Azure development workload.
- Azure for Students account, or local emulators (Azurite for Storage + Azure Storage Explorer).
- Node.js for running the Dashboard.
🖥 Local Environment Setup
Before running the applications, configure the storage connection strings:
- Start Azurite to emulate Azure Storage services locally.
- Azure Functions project – populate
local.settings.jsonwith your storage credentials (useUseDevelopmentStorage=truefor local work). - Web API project – fill
appsettings.jsonwith the correspondingAzureOptionsconfiguration.
A. Azure Functions (local.settings.json) Create or update the local.settings.json file in the root of your Azure Functions project. This file configures the serverless runtime, trigger schedules, and connection details for all storage services (Table, Blob, and Queue).
 {
  "IsEncrypted": false,
  "Values": {
    "AzureWebJobsStorage": "UseDevelopmentStorage=true",
    "FUNCTIONS_WORKER_RUNTIME": "dotnet-isolated",
    "GridMonitorSchedule": "*/10 * * * * *",
    "AzureTableOptions:ConnectionString": "UseDevelopmentStorage=true",
    "AzureTableOptions:TelemetriesTable": "Telemetries",
    "AzureTableOptions:DevicesTable": "Devices",
    "AzureTableOptions:DeviceStatusesTable": "DeviceStatuses",
    "AzureTableOptions:FirmwaresTable": "Firmwares",
    "AzureBlobOptions:FirmwareBlob": "firmware-updates",
    "AzureBlobOptions:ConnectionString": "UseDevelopmentStorage=true",
    "AzureQueueOptions:AlertQueue": "alert-queue",
    "AzureQueueOptions:DeviceStatusQueue": "device-status-queue",
    "AzureQueueOptions:ConnectionString": "UseDevelopmentStorage=true",
    "ParallelSettings:MaxDegreeOfParallelism": 20
  }
}
B. ASP.NET Core Web API (appsettings.json) Update the appsettings.json file in your Web API project. This configuration allows the Web API to host the SignalR Hub, manage CORS for the Dashboard, and enables the Background Worker to poll the status queue.
{
  "Logging": {
    "LogLevel": {
      "Default": "Information",
      "Microsoft.AspNetCore": "Warning"
    }
  },
  "AllowedHosts": "*",
  "WebApi": {
    "CorsPolicyName": "_reactAppPolicy",
    "ReactOrigin": "http://localhost:5173",
    "DeviceHubRoute": "/device-status-hub"
  },
  "AzureQueueOptions": {
    "ConnectionString": "UseDevelopmentStorage=true",
    "DeviceStatusQueue": "device-status-queue"
  },
  "AzureTableOptions": {
    "ConnectionString": "UseDevelopmentStorage=true",
    "DevicesTable": "Devices",
    "FirmwaresTable": "Firmwares",
    "DeviceStatusesTable": "DeviceStatuses"
  },
  "AzureBlobOptions": {
    "ConnectionString": "UseDevelopmentStorage=true",
    "FirmwareBlob": "firmware-updates"
  },
  "ParallelSettings": {
    "MaxDegreeOfParallelism": 20
  }
}
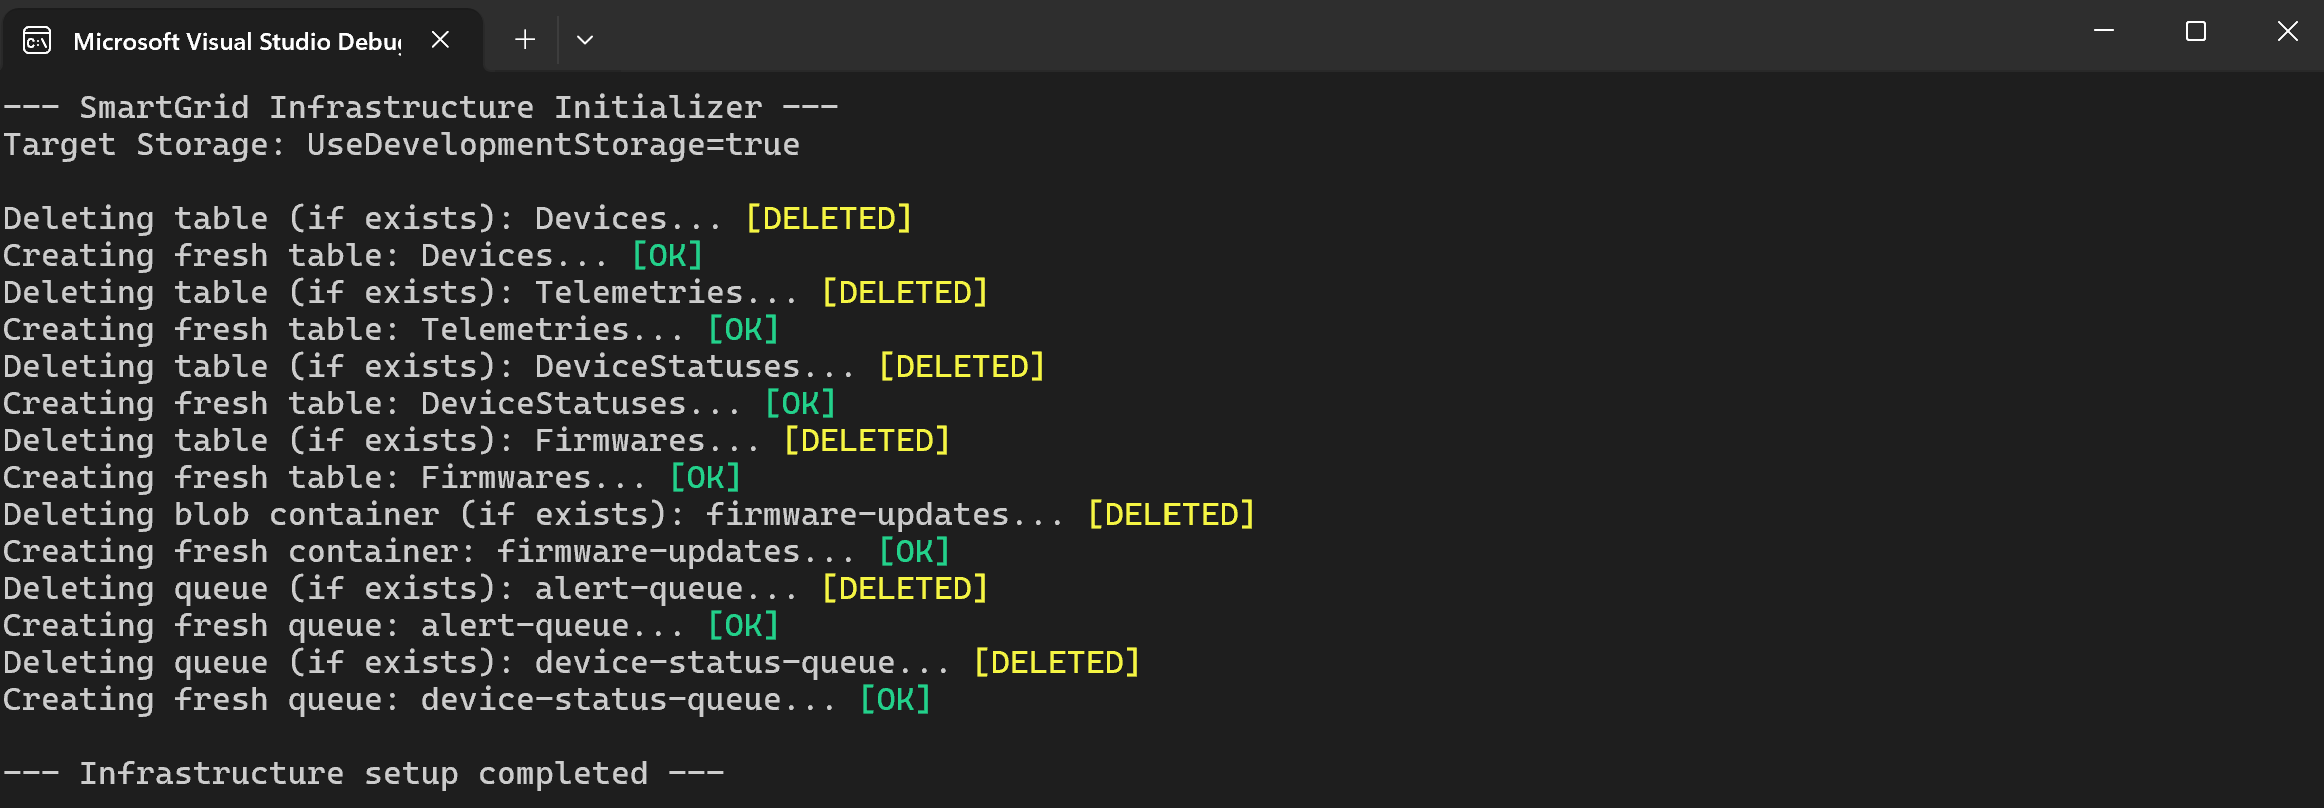
Infrastructure Initialization (Tools Project)
Before starting the Azure Functions or the Web API, you must initialize the storage resources in your local emulator (Azurite) or Azure account. This is done via the Tools console application.
Running the Backend
- Open the solution in Visual Studio 2022.
- Set both the Azure Functions and Web API projects as startup projects.
- Press F5.
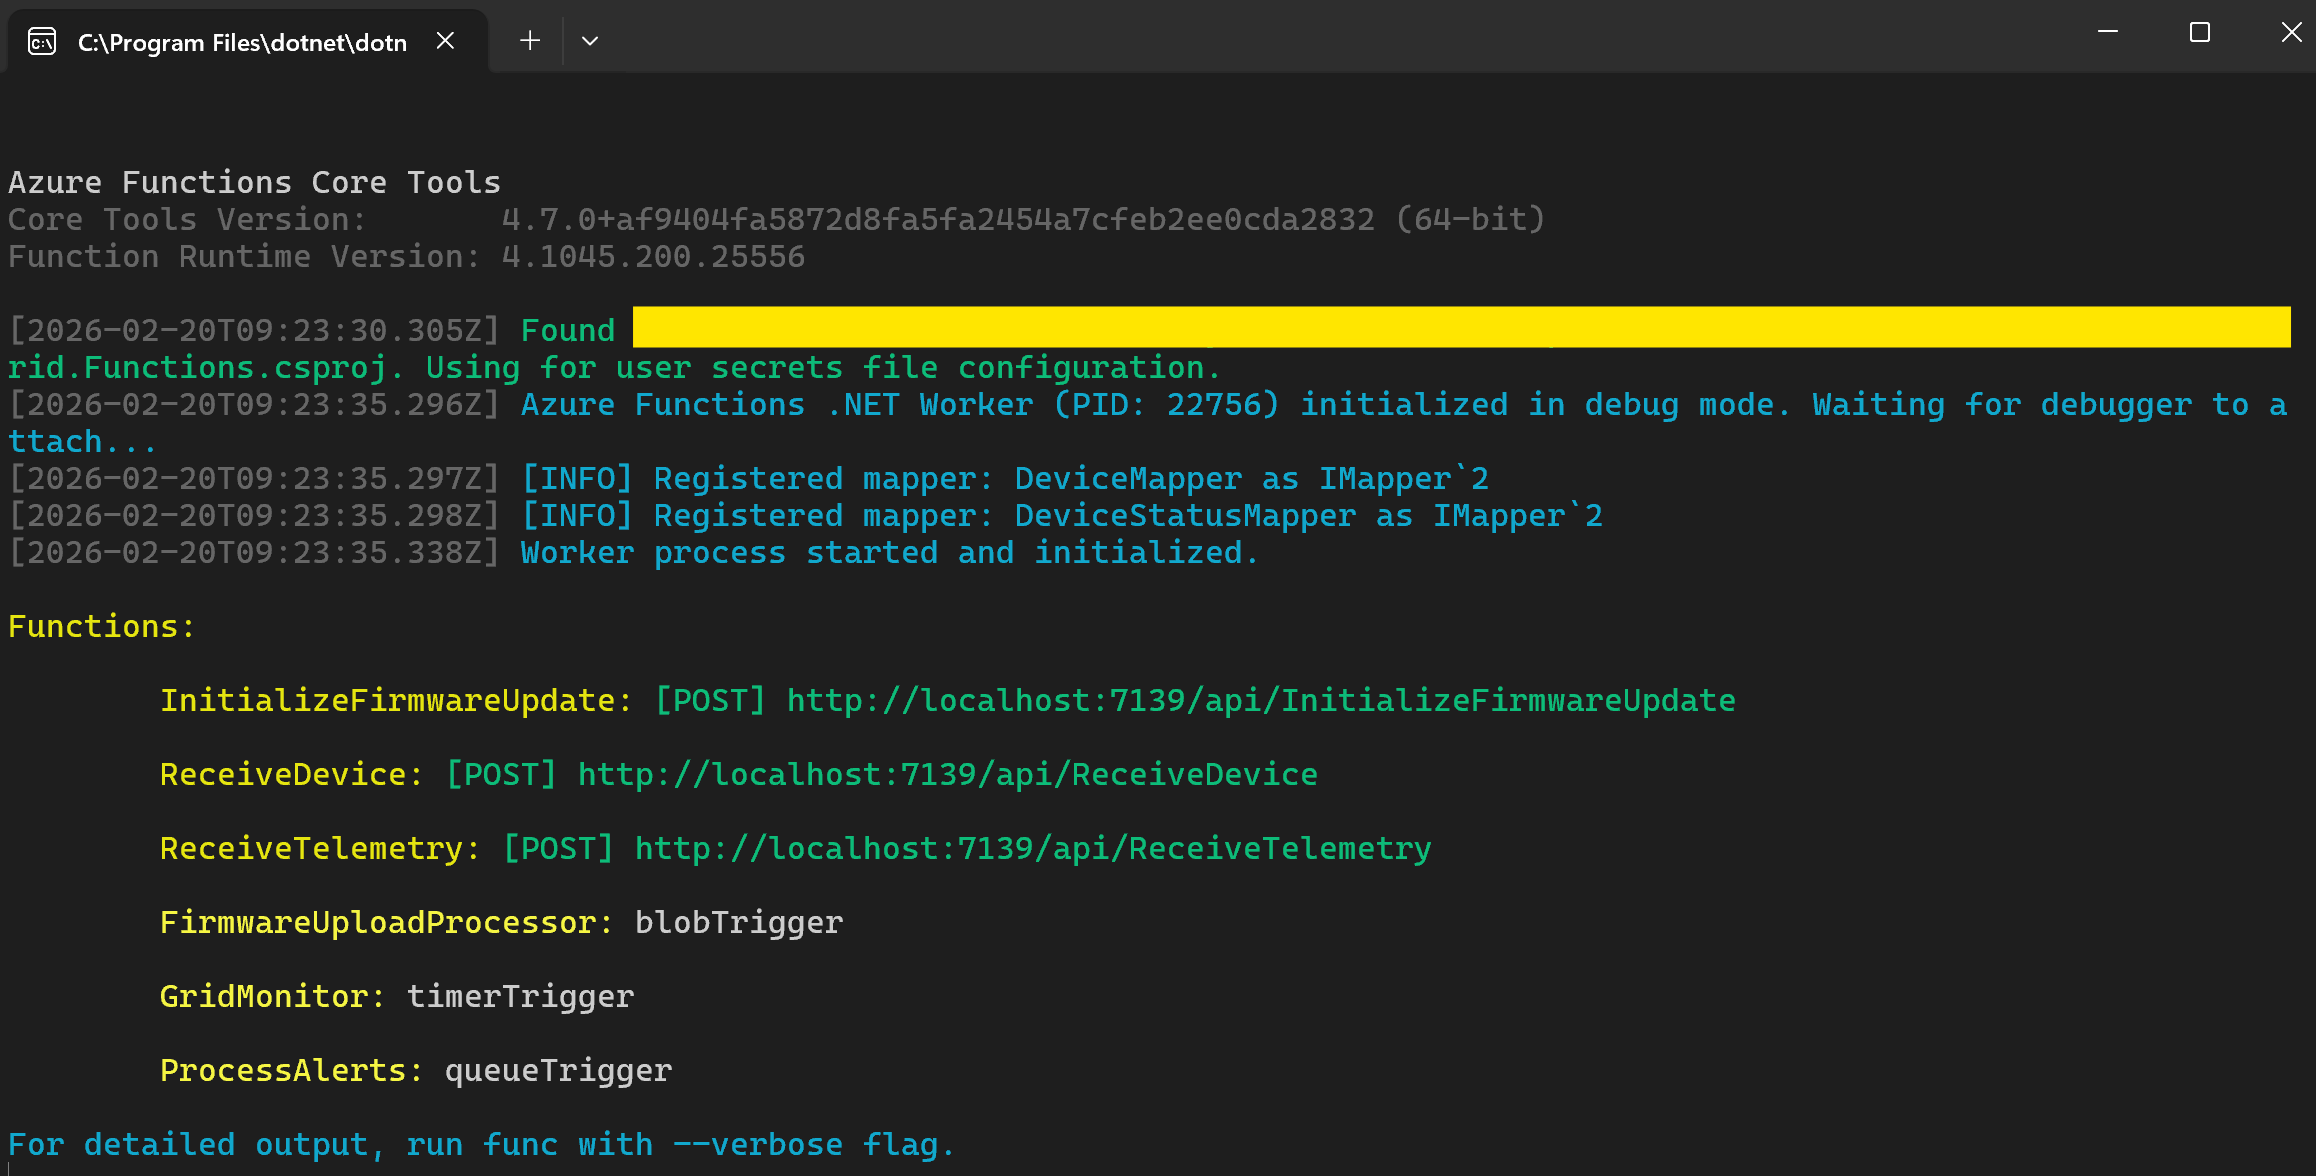
- The Azure Functions Core Tools console will open, listing all detected function endpoints (e.g.,
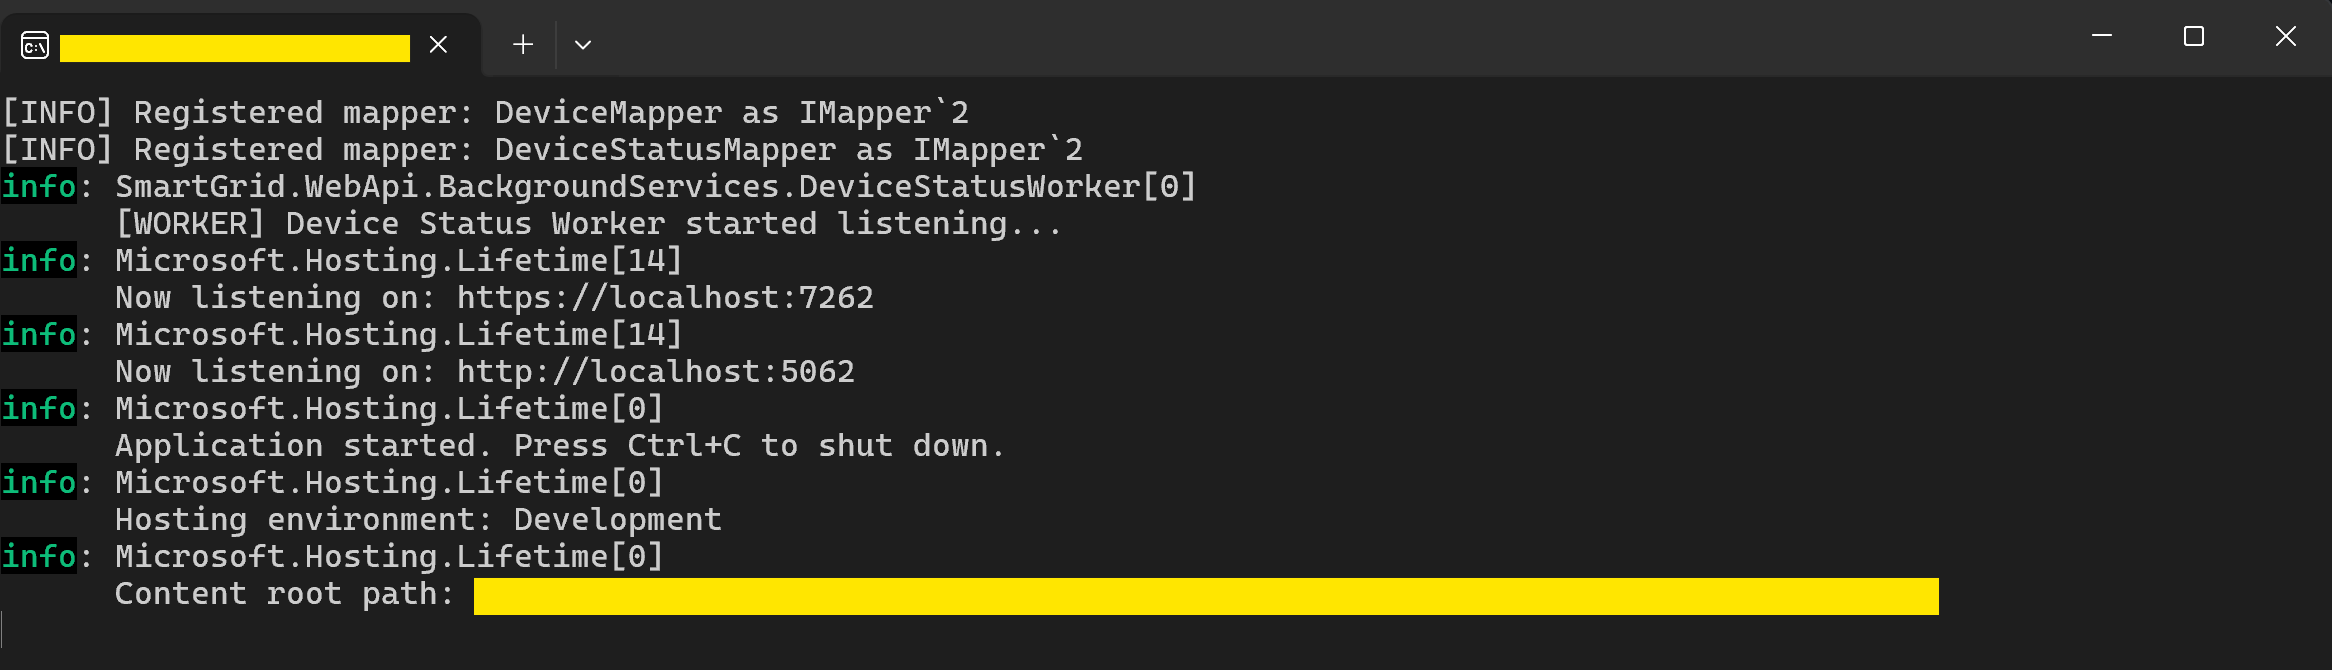
ReceiveTelemetry,GridMonitor). - The Web API will start, hosting the SignalR Hub and REST endpoints.
- The Azure Functions Core Tools console will open, listing all detected function endpoints (e.g.,
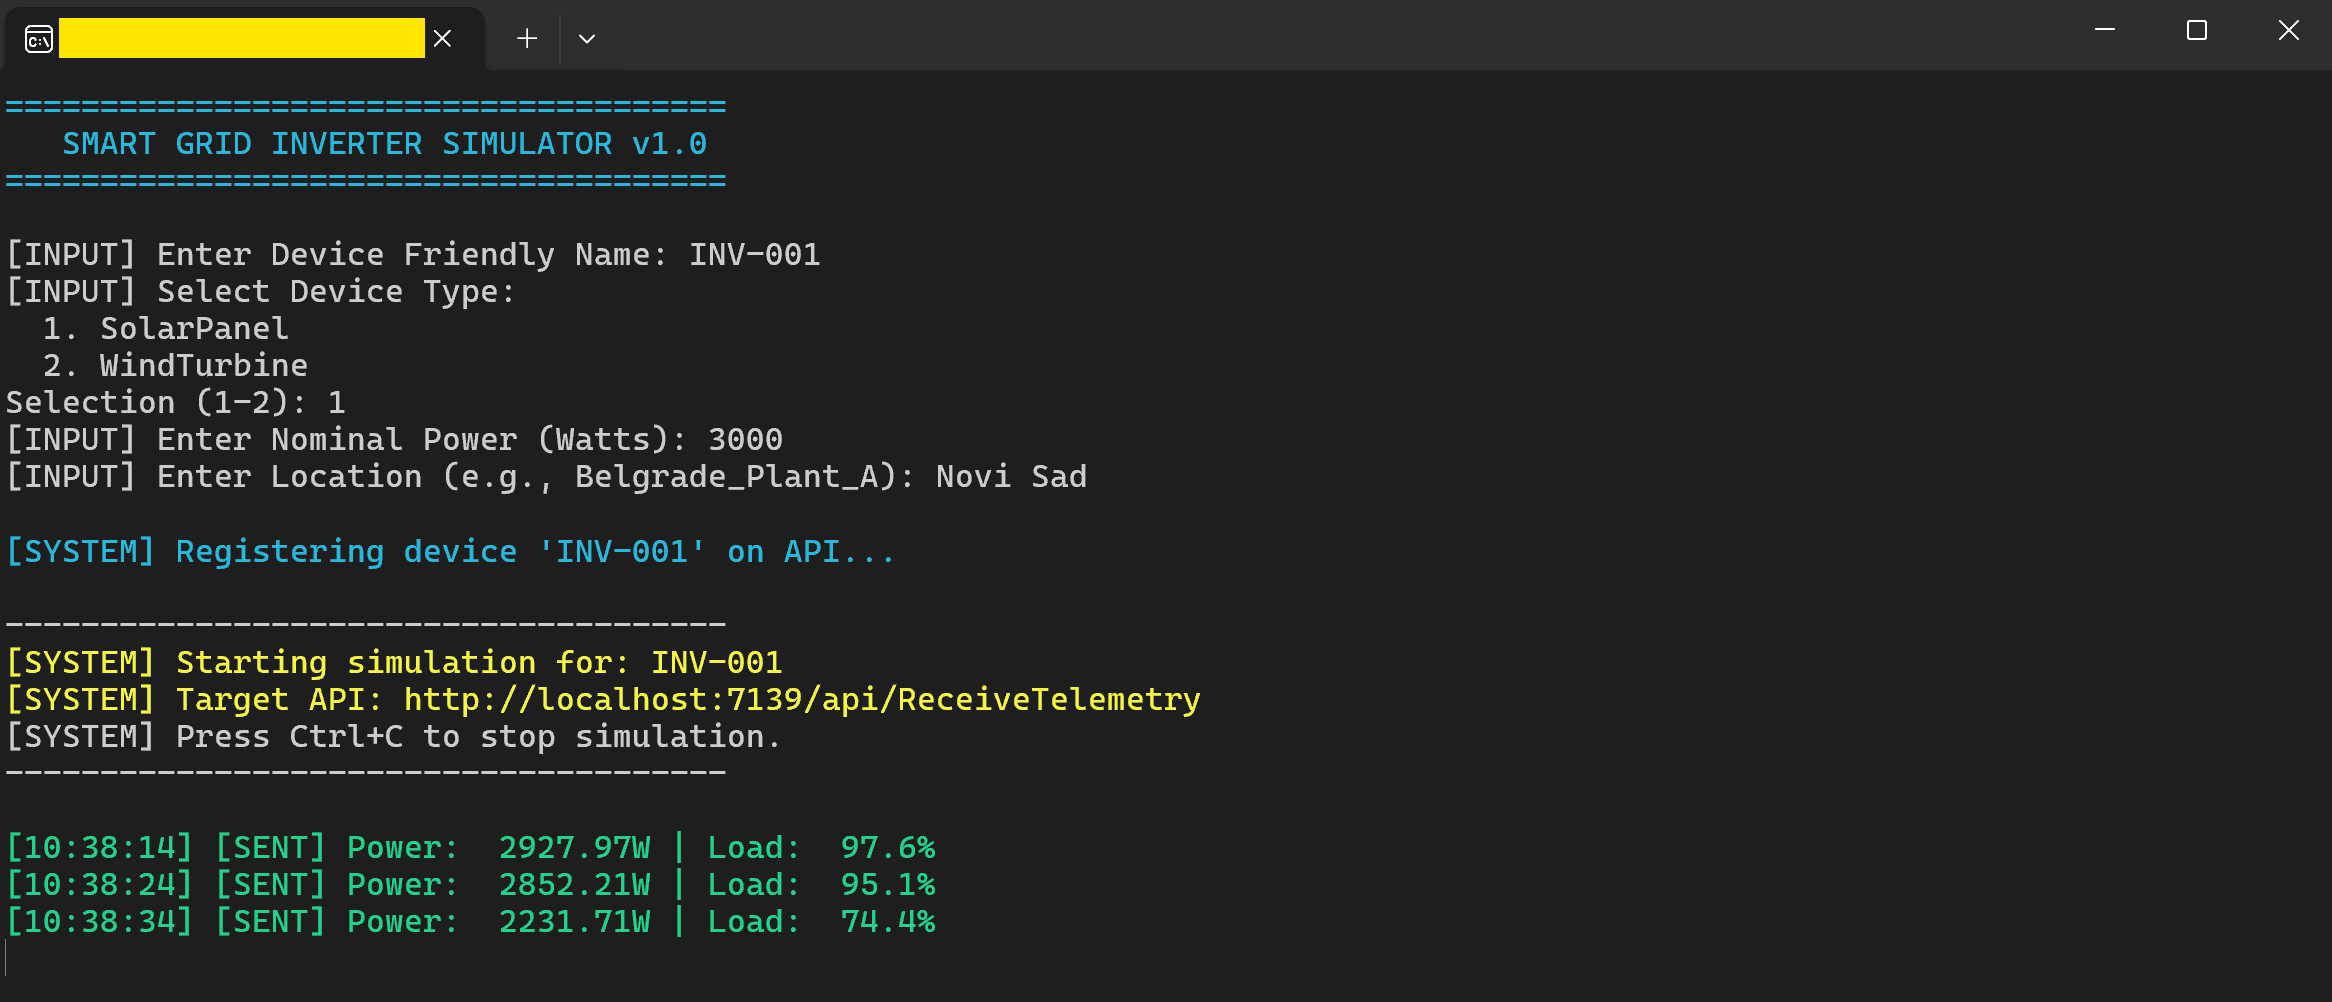
Running the Inverter Simulator
- Run the Inverter Telemetry Simulator (Console Application).
- Follow the prompts to register a device — enter
DeviceName,NominalPower,DeviceType(Solar Panel or Wind Turbine), andLocation. - Once registered, the simulator enters a loop, sending telemetry data every 10 seconds to the cloud.
Running the Dashboard
- Open a terminal in the Dashboard project directory.
- Install dependencies:
npm install - Start the application:
npm run dev - The dashboard will be available at the address shown in the terminal (typically
http://localhost:5173).
Deployment to Azure
- Azure Portal – Create a Function App (Consumption plan) and a Storage Account.
- Visual Studio – Right-click the project → Publish → Select Azure Function App → Choose your created resource.
- Configuration – Update the cloud endpoint URLs in the Simulator and Dashboard to point to your deployed Azure services.
📄 License
This project is the intellectual property of the author. It is distributed under the MIT License. See the LICENSE file for more information.
Note: This system was designed and developed by the author as part of the “Cloud Application Development in Smart Grids” course at the Faculty of Technical Sciences, Novi Sad. While the project was created within an academic framework, all implementation details, architecture design, and source code are the sole property of the author.
🤝 Contributing
Contributions are what make the academic community such an amazing place to learn, inspire, and create. Any contributions you make are greatly appreciated.